Monday, July 7, 2014

Task 3: Start the Project

Final Artwork

About my final Idea, Ring Light Camera, I make two ring light camera, one for macro lens and one for portrait picture and usually for take picture for human,purpose to make things is for future others people and easy to use this thing.

here is my making process to make ring light camera

Firstly you will need to know what is your favorite Macro lens that you wanna use with this awesome product . From the diameter of the choice of your lens, say 55 mm, add another Lens Macro to it, thus making it something like macro lens. the things items supplied as paper box, foil, sellotape. Check out the image below.


Draw two concentric circles on the cardboard. One approximately  follow with your a camera lens size.


Finish draw the circle with size, cut the paper box use cutter.


Second, Make the form ring light camera, stick use sellotape. 


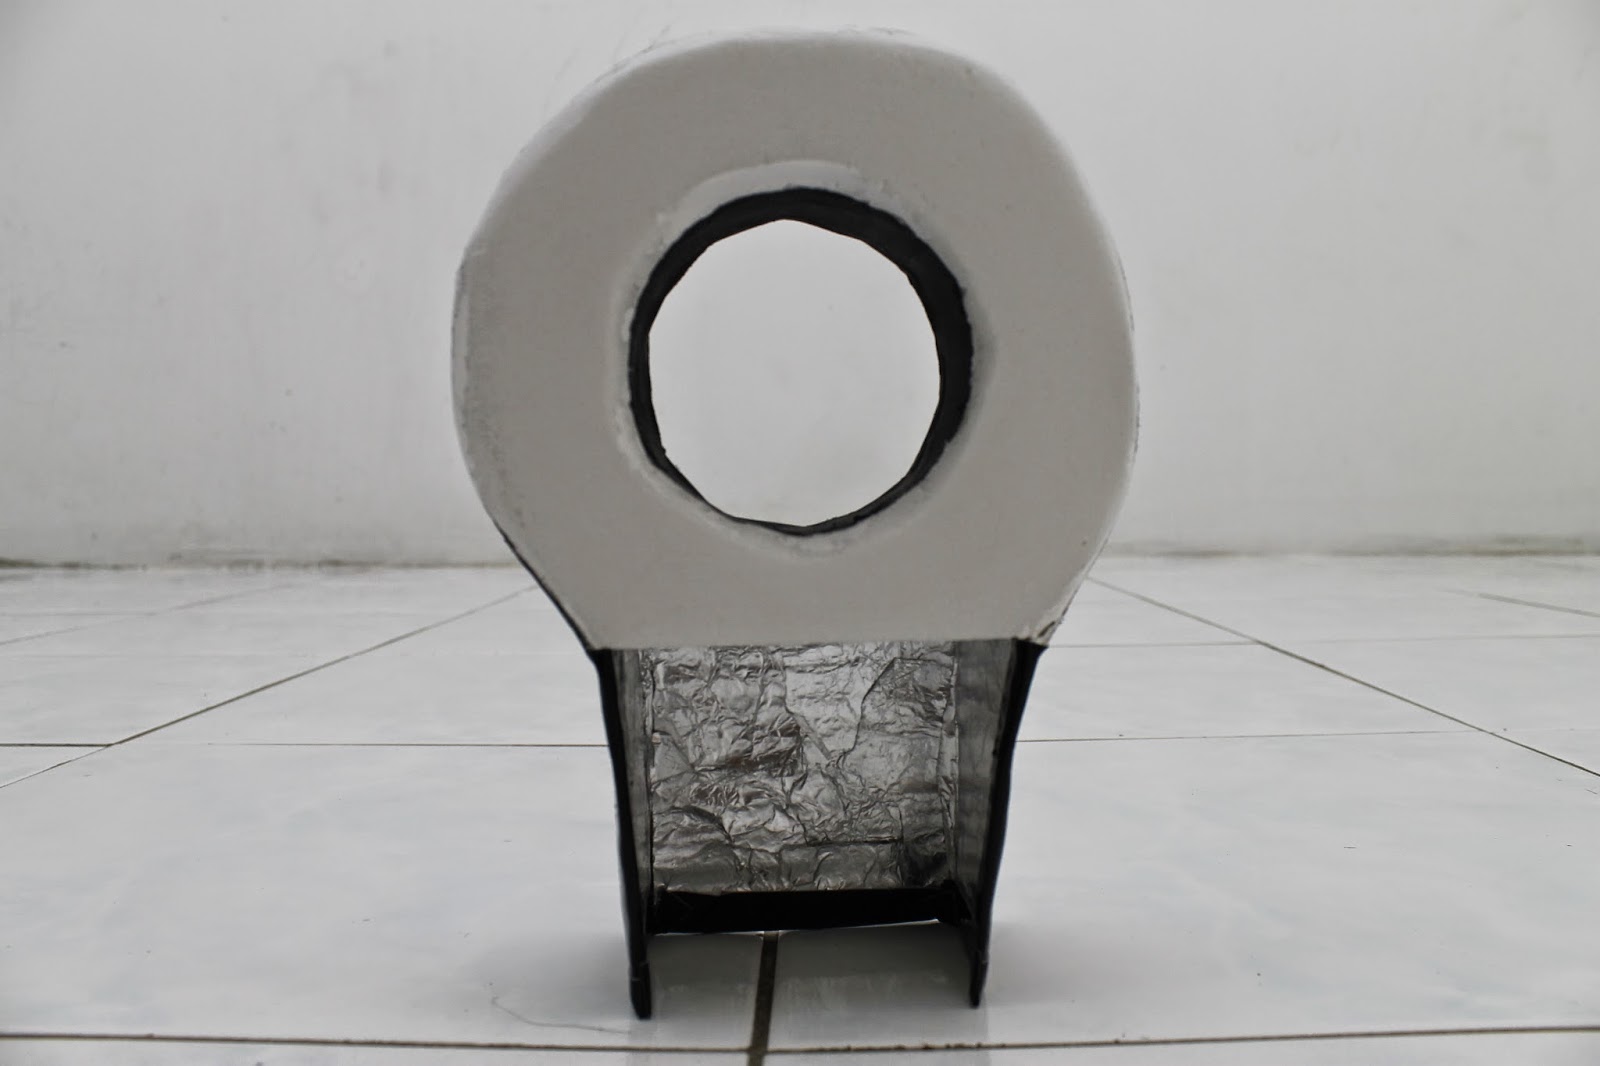
Third after finish make the form ring light, put the glue in the region for easy to stick foil.


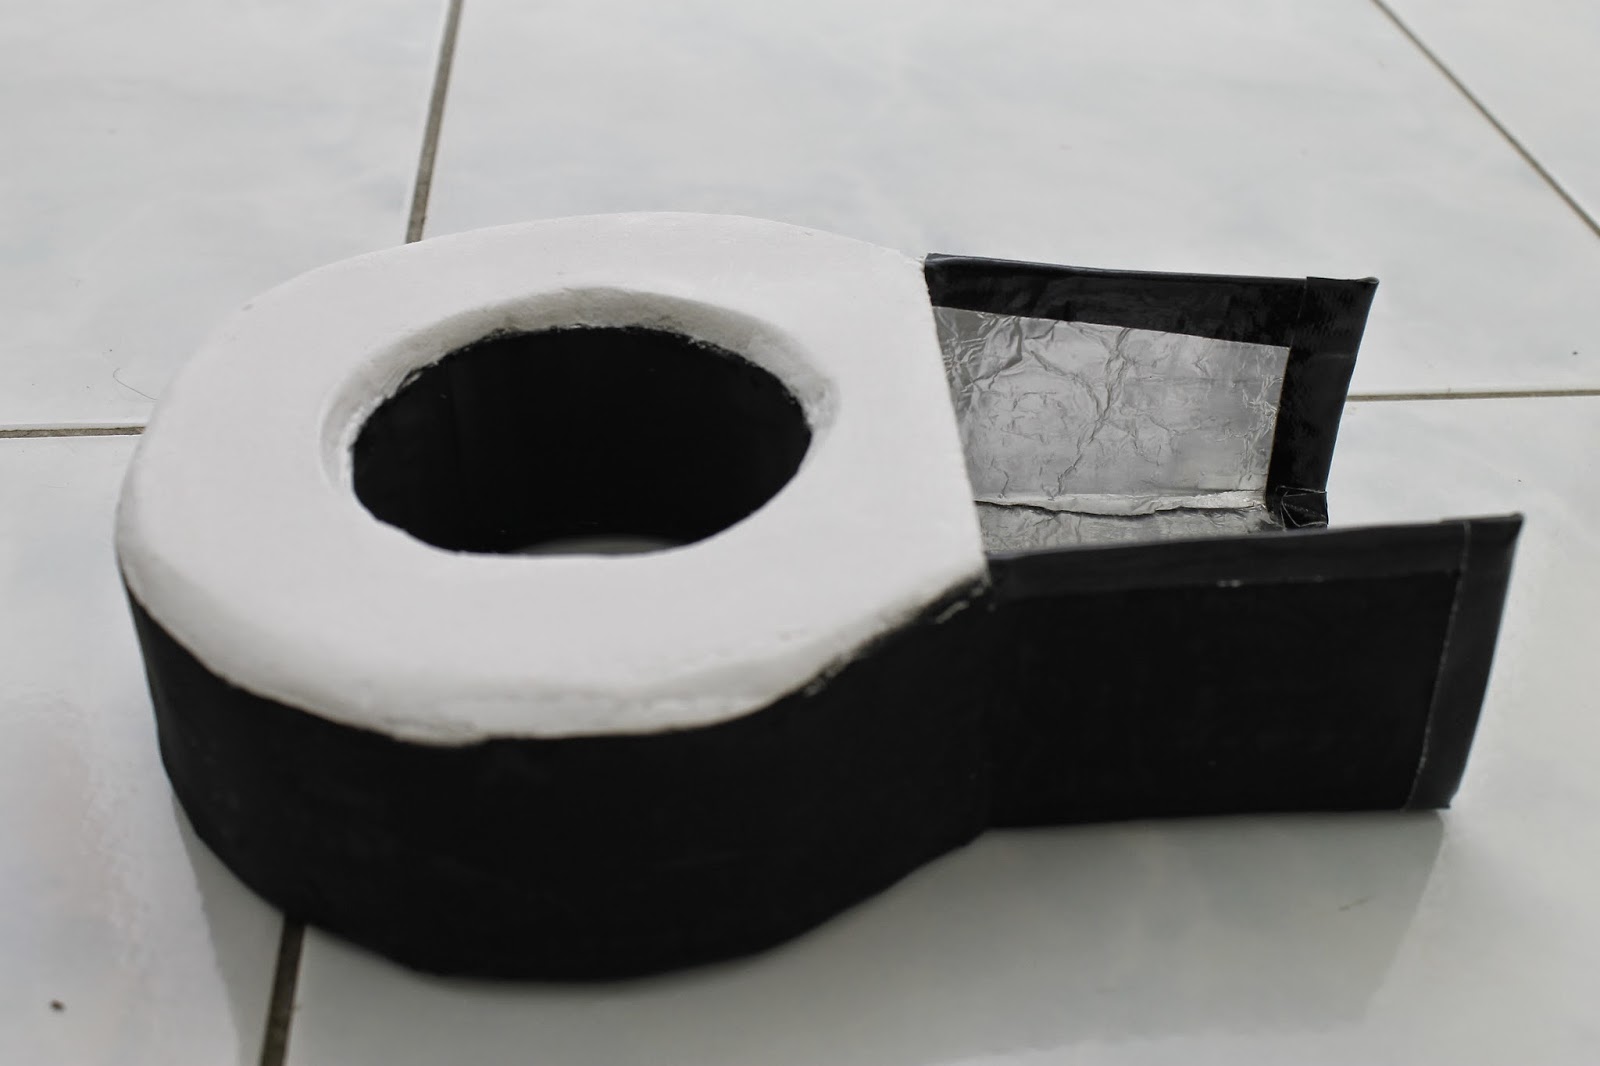
Fourth, after put the glue, stick the foil in the region, about foil, why I choose foil put in region of box because the function is for reflect light from speed light.After that you need to put also paper box follow the first form and close it, but your need to put white form board for get soft light and cut follow with first form.


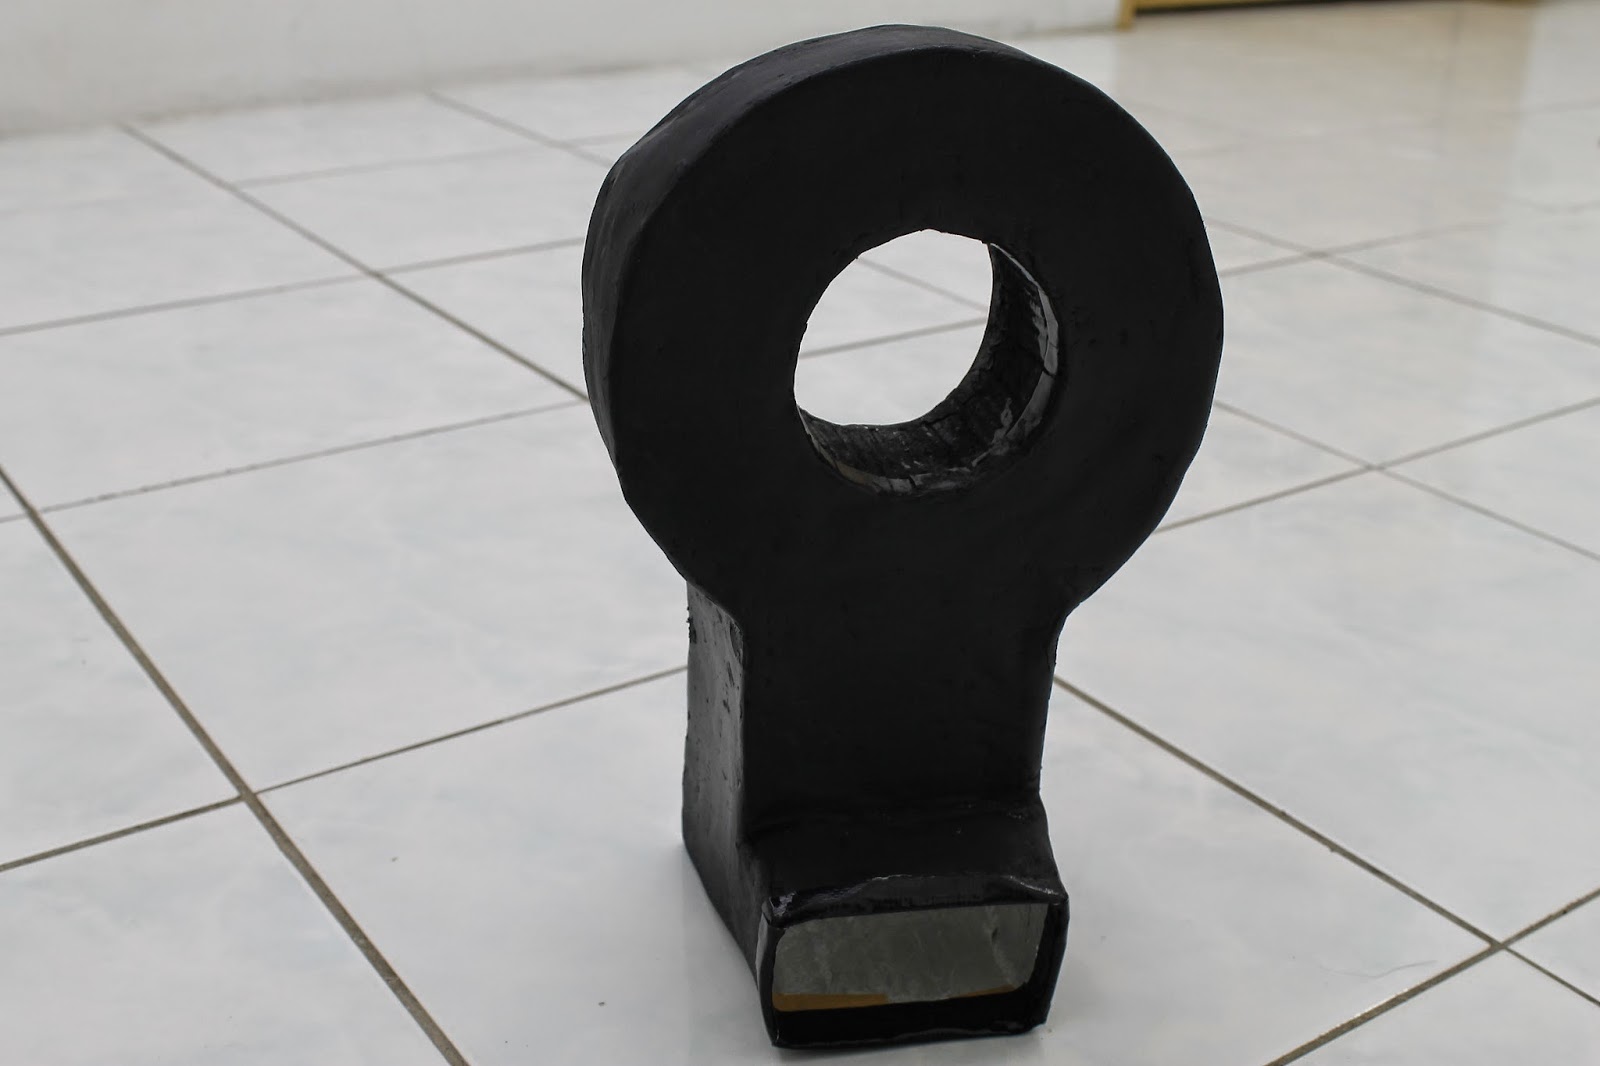
Done for it, after that spray your ring light with color do you want.


Here is final outcome for ring light what i want. 


Done Macro ring light


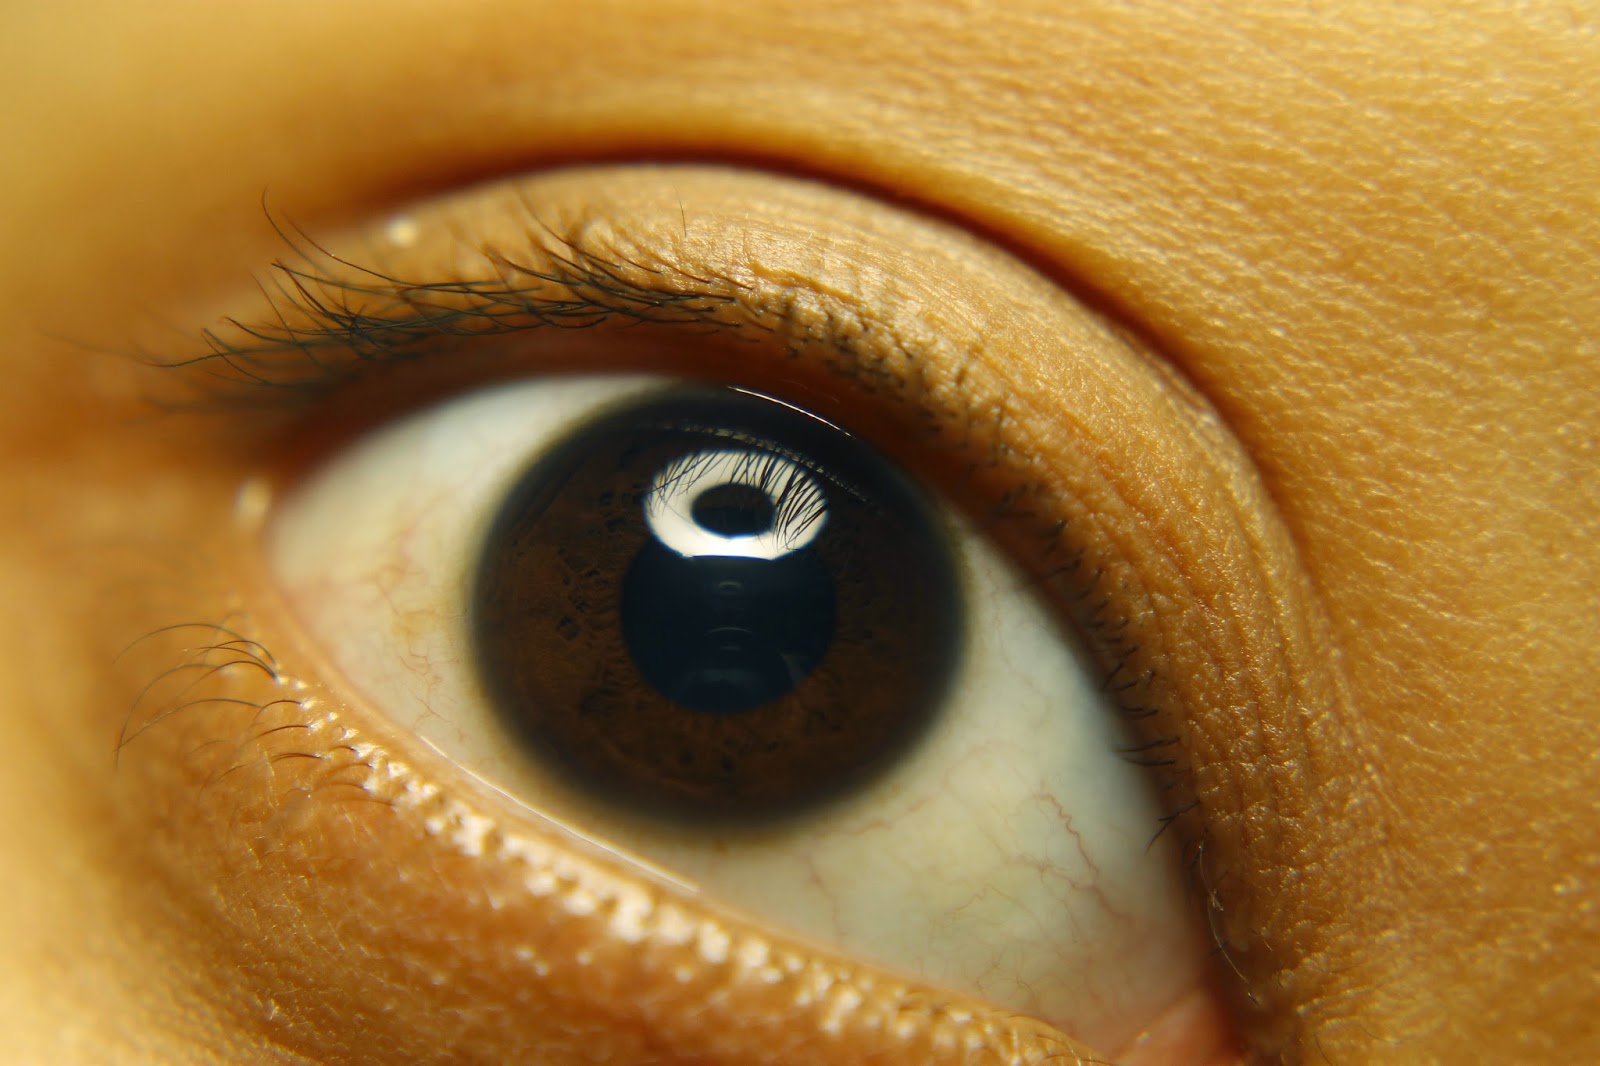
Here is picture from making the ring light camera. I snap the picture of eye, what I get is you can see the detail of eye when you use macro ring light with your lens.


Here is second ring light camera I want for this, the step same like first lighting I make but different, because this I make for portrait human. After follow step from first lighting I add paper box and make the form ring light camera, also put the foil for get the light and put form board to get soft light.


After from first step until put the foil and make the form spray the things with color do you want.


here is final outcome Here is final outcome for ring light for portrait human what I want. 


Task 4: Review and Enhance

Review and Enhance, review on the given learning outcomes, for a self assessment.

Learning outcomes for this task I get many texture with new pattern, new texture, and give inspiration to me, get more knowledge.

besides, this subject also gave me a lot of awareness about the use of graphic software such as Adobe Illustrator and Adobe Photoshop through tutorials given by the lecturer.

During this last class I found a lot of new techniques that I have found to improve my work for next semester, Lessons given by the lecturer is very effective and beneficial to me to create a new design.


In First task, Sixth sense. I found the sound record from Heavy Rain and listen and make design from sound record what we can imagine the the.


Figure 1: Sixth Sense "Heavy Rain"


This is second task for this subject is Optical Illusion, This task is very interesting for me and give me a lot knowledge about this. Optical Illusion is design what is you see like movement but actually it's not move but design plays to fool our eyes to look as if is moving.


Figure 2: Optical Illusion "Perspective from Small to Big"


Here is third task texture. I have choose texture keyboard and texture fingerprint, the color I choose is black and white, why black and white because the keyboard usually found is black color and about fingerprint because we cant to see the fingerprint otherwise use charcoal, color or torchlight investigators. Why I choose Keyboard and Finger print because this two word is always I'm doing when I open my Computer and make the work, as graphic designer with photography we must to memorize the key from keyboard easy to making some work, and why I put my name at the texture because the key from keyboard 'D' 'A' 'T' 'U' is the first time I learn to press the keyboard. This is final outcome for my texture I have choose, to make this texture I'm using Adobe illustrator and adobe Photoshop.


Figure 3: the Texture Keyboard & Finger Print


Friday, July 4, 2014

TUTORIAL IN CLASSES

Tutorial Using Adobe Illustrator, Lecturer explain to us how to use this software, how to make pattern shape, color, and interesting things, what i get from this tutorial i get more knowledge how to use this software and easy to me for make any assignment for next semester. I have make own design from the tutorial.


Figure 1: Pattern and color


Figure 2: Shape and Pattern


Figure 3: Shape, foam, color, pattern


Figure 4 : 3D font, Pharagraph, Gradient color, Foam, 3D Foam


Figure 5 : My own design what I get from tutorial


Task 3: Texture And Color

For this task we need to find 10 texture/pattern, etc, and we need to scan the texture and put in computer, Some of my texture I use Charcoal for get texture and I collect thing outside and scan put in computer.


Here is 10 my texture:

 
                                      Figure 1: Skin of Tree              Figure 2: Coin 


Figure 3: Skin of Tree with coin


                                  Figure 4: Tyre car                            Figure 5: Road Tar


Figure 6: Tyre Car with Road Tar


                                      Figure 7: Dried Leaves         Figure 8: Broken Paper


Figure 9: Dried Leaves with Broken Paper


                             Figure 10: Surface of Plywood               Figure 11: Wall               


Figure 12: Surface of Plywood with Wall


                                Figure 13: Keyboard                         Figure 14: Finger Print


Figure 15: Keyboard with Finger Print


Task 4 : Circuit of Culture " To produce a cabinet of curiosity"

What is Circuit of culture.

What is the circuit of culture and what is the use of it? It is the trajectory along which
meaning is produced through all involved people in the culture. Culture also can be understood in terms of 'shared meanings'.

For this task we need to find Circuit of culture around Mantin village. We got the curcuit of culture from Hakka village and we have visited together with group member, I got from my research before this, we have interview people,the hakka village is one of the old village occupied since a hundred years ago,

So what we get from there is we have taking the picture and we find the things traditional in the village is like 'way of life'.


Here is the picture from Hakka Village.


Figure 1: the wells


Figure 2: The wells

Here is the picture wells, its show in hakka village they still use this for shower, the wells is one of tradition they.


Figure 3: Equipment for work

The picture show they tradition work, they still use for work.


Figure 4: The old women 

The picture show the old woman still life and still stay in hakka village and still running tradition, they calling she is "popo", her age is around 87 years old


Figure 5: Married


Figure 6: Married

The picture show the old picture they married around 1947 


Figure 7: The old Wells


Figure 8: The old Wells


Figure 9: The old Wells